
Install the app EU-Gewährleistungslabel, GARAN from the Shopify App Store, choose the pages and the display for the notice, add any producer guarantees and paste the snippet into the order confirmation. From then on, the app automatically shows the official graphic in the customer’s language.
The screenshots show the app’s German interface. The app is also available in English and follows the language you use in the Shopify admin.
Step 1: Install the app
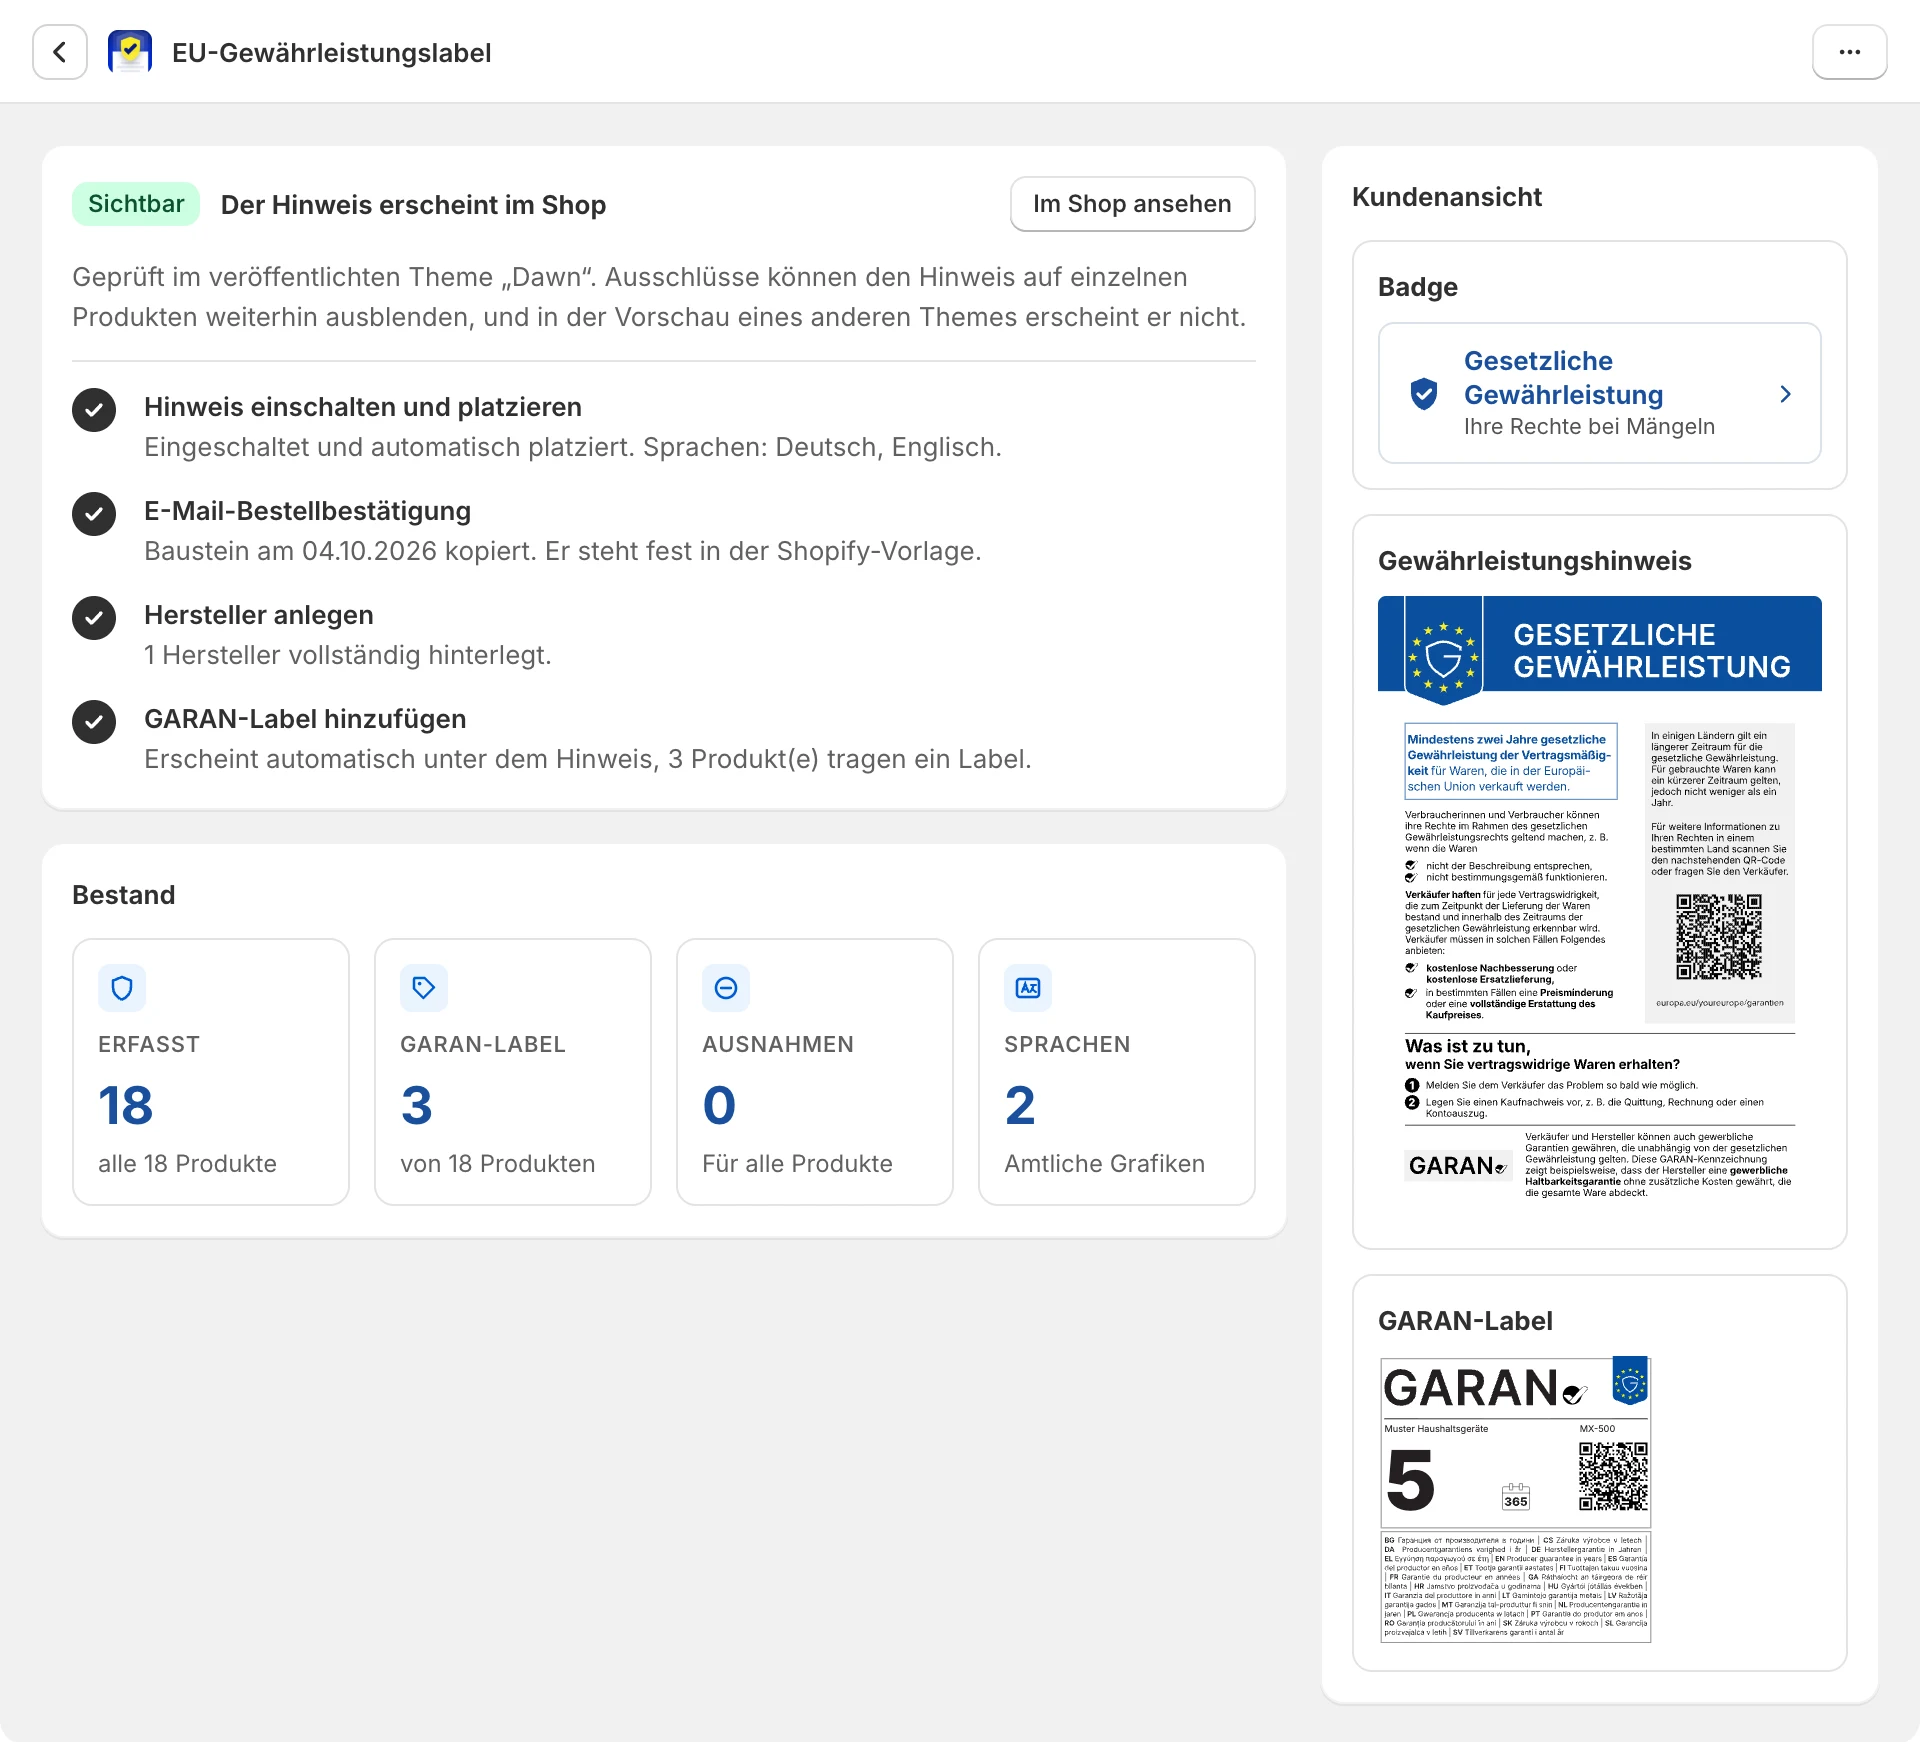
Open the app EU-Gewährleistungslabel, GARAN in the Shopify App Store and click “Install”. Choose a plan; the first 7 days are free. The overview then opens. It shows what is still missing and, on the right, a preview of how the badge, the notice and the GARAN label look to your customers. Once everything is done, it says “Visible” at the top.
Step 2: Switch on the notice and choose the display
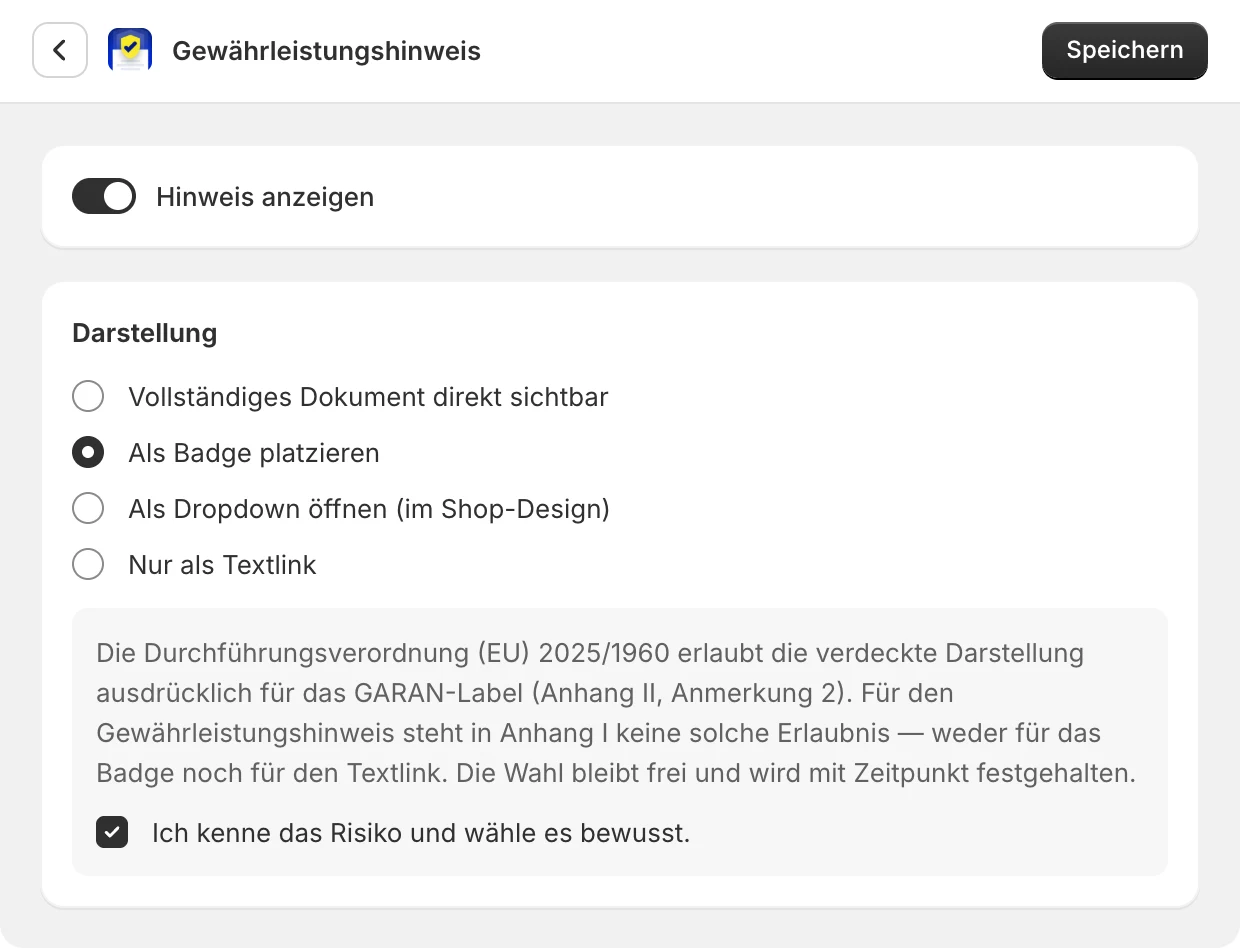
In the overview, click “Set up now”. The app reads your shop’s languages, loads the official graphics and switches the display on. Under “Display” you choose how the notice appears: as the full document, as a badge, as a collapsible dropdown or as a text link. For the hidden forms, the app points out that the regulation expressly allows them only for the GARAN label. Your choice is recorded with a timestamp.
Step 3: Choose where the notice appears
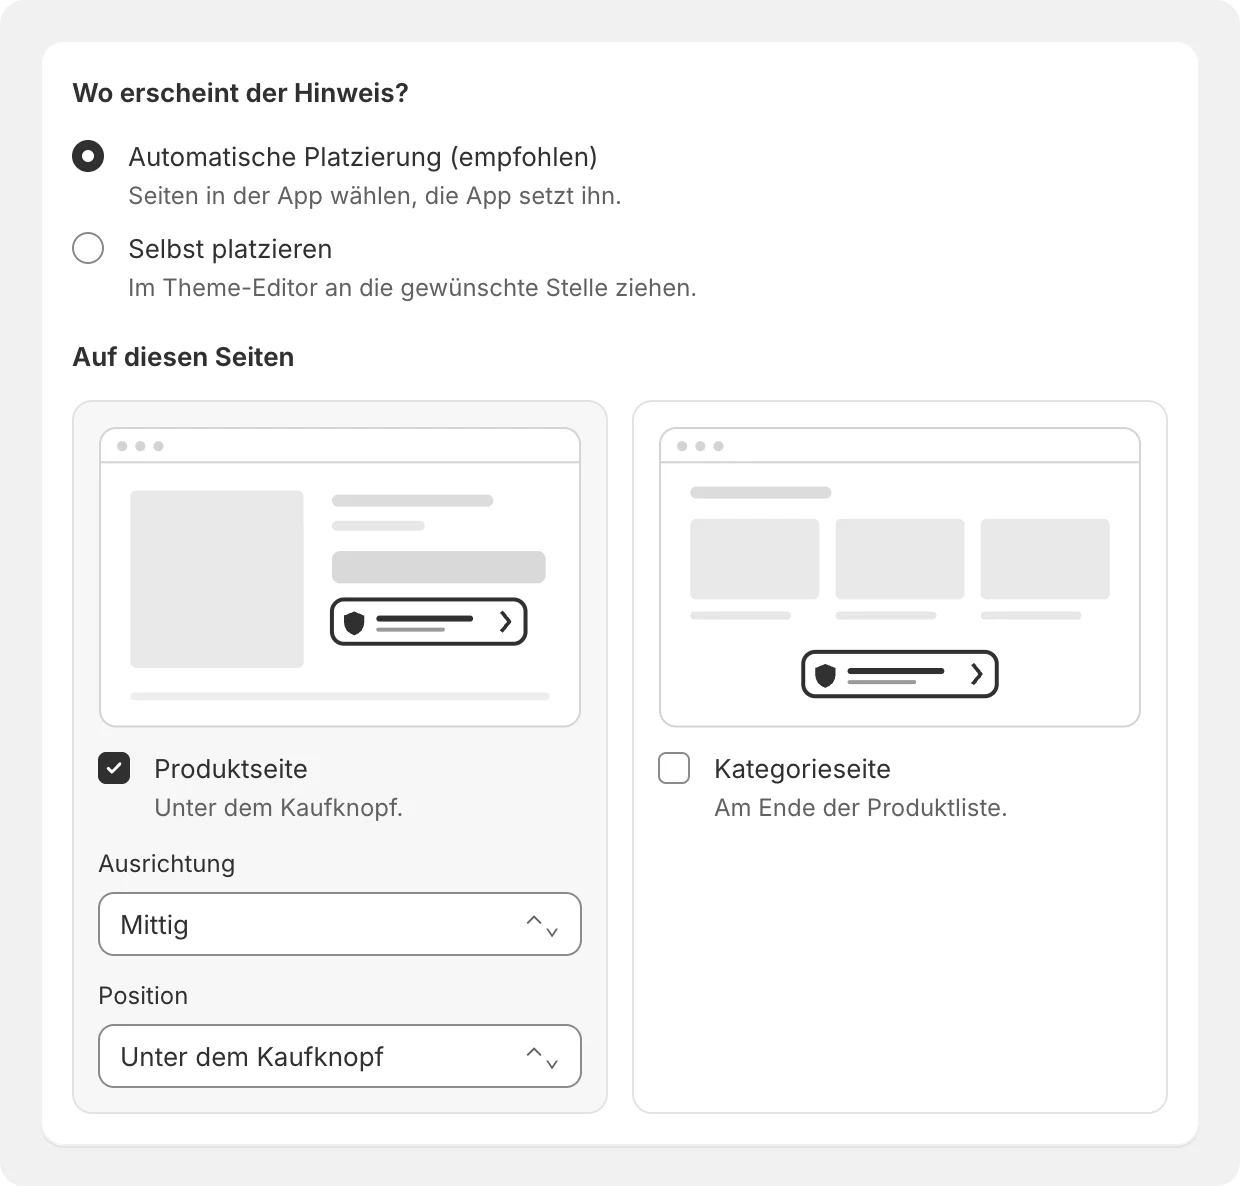
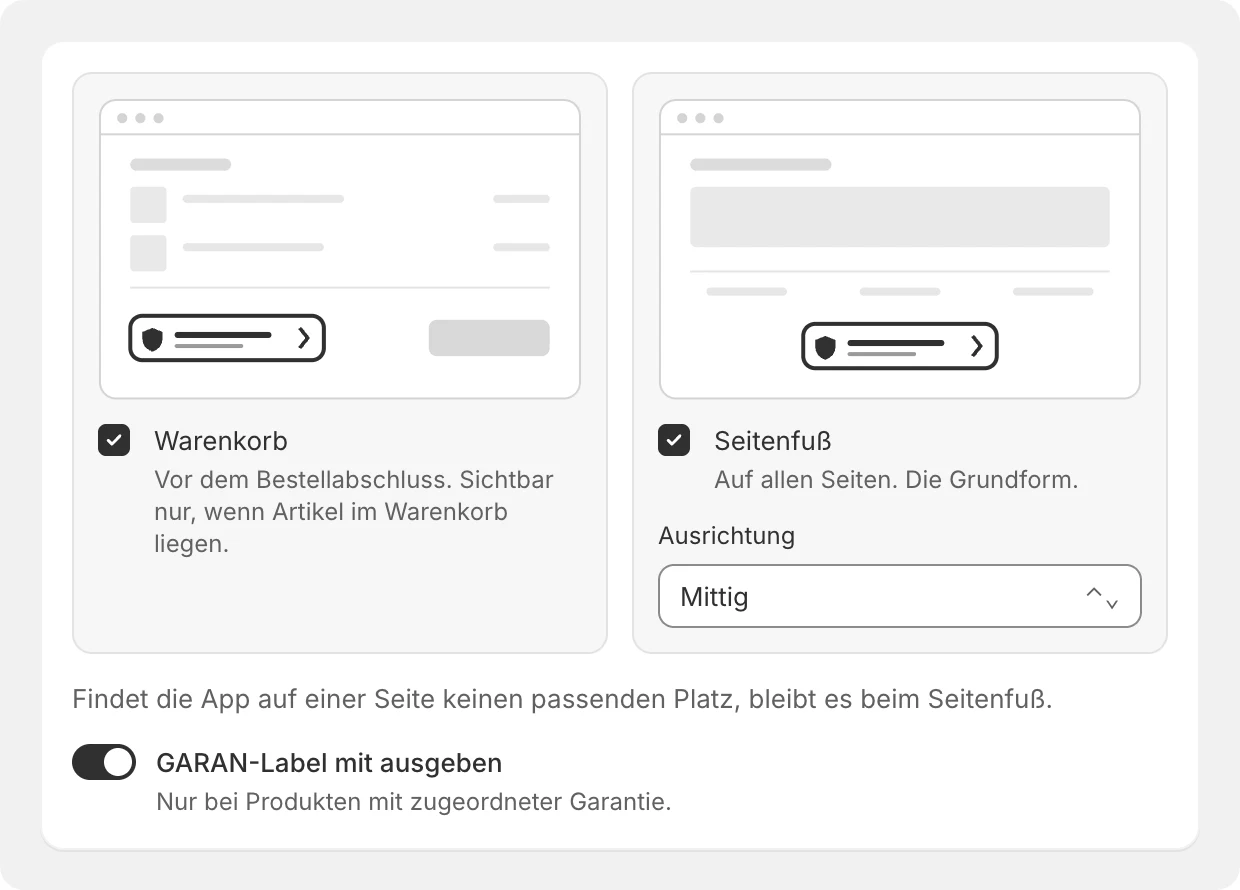
With “Automatic placement”, you tick the pages and the app places the notice itself: on the product page below the buy button, on collection pages at the end of the product list, in the cart before checkout and in the footer. If the app finds no suitable spot on a page, the notice stays in the footer. If you prefer to decide yourself, choose “Place it myself” and drag the block to the right spot in the theme editor.
Step 4: Match the badge to your shop
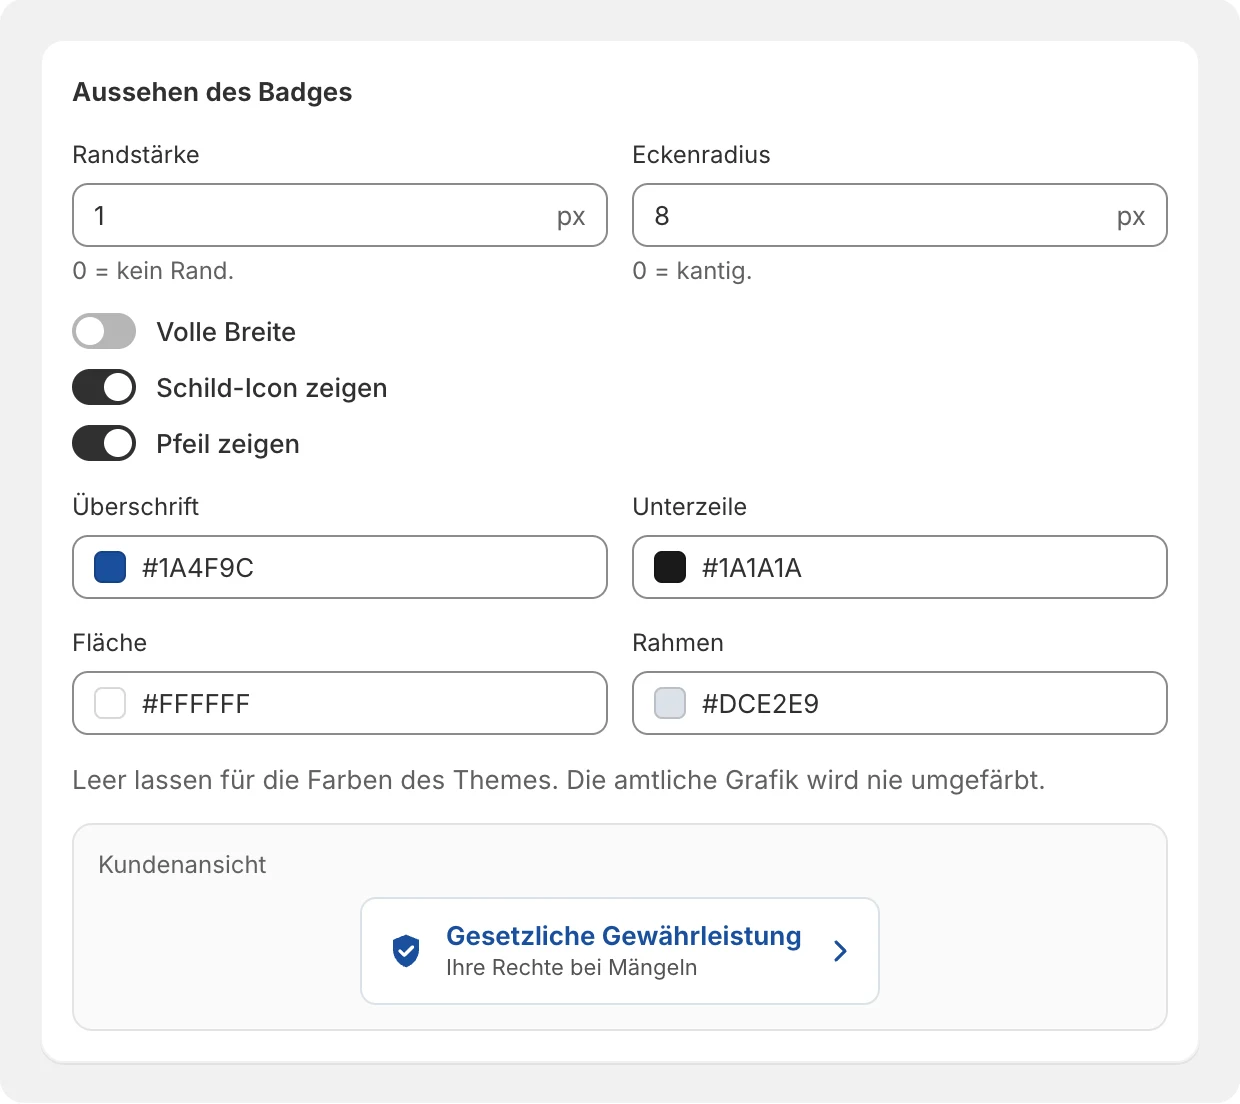
Border thickness, corner radius, full width, shield and arrow, and the colours of heading, subline, surface and border. Empty colour fields take your theme’s colours. The app never recolours the official graphic itself. Custom colours and shapes come with the Pro plan. Click “Save” at the top right.
Step 5: Check languages and exceptions
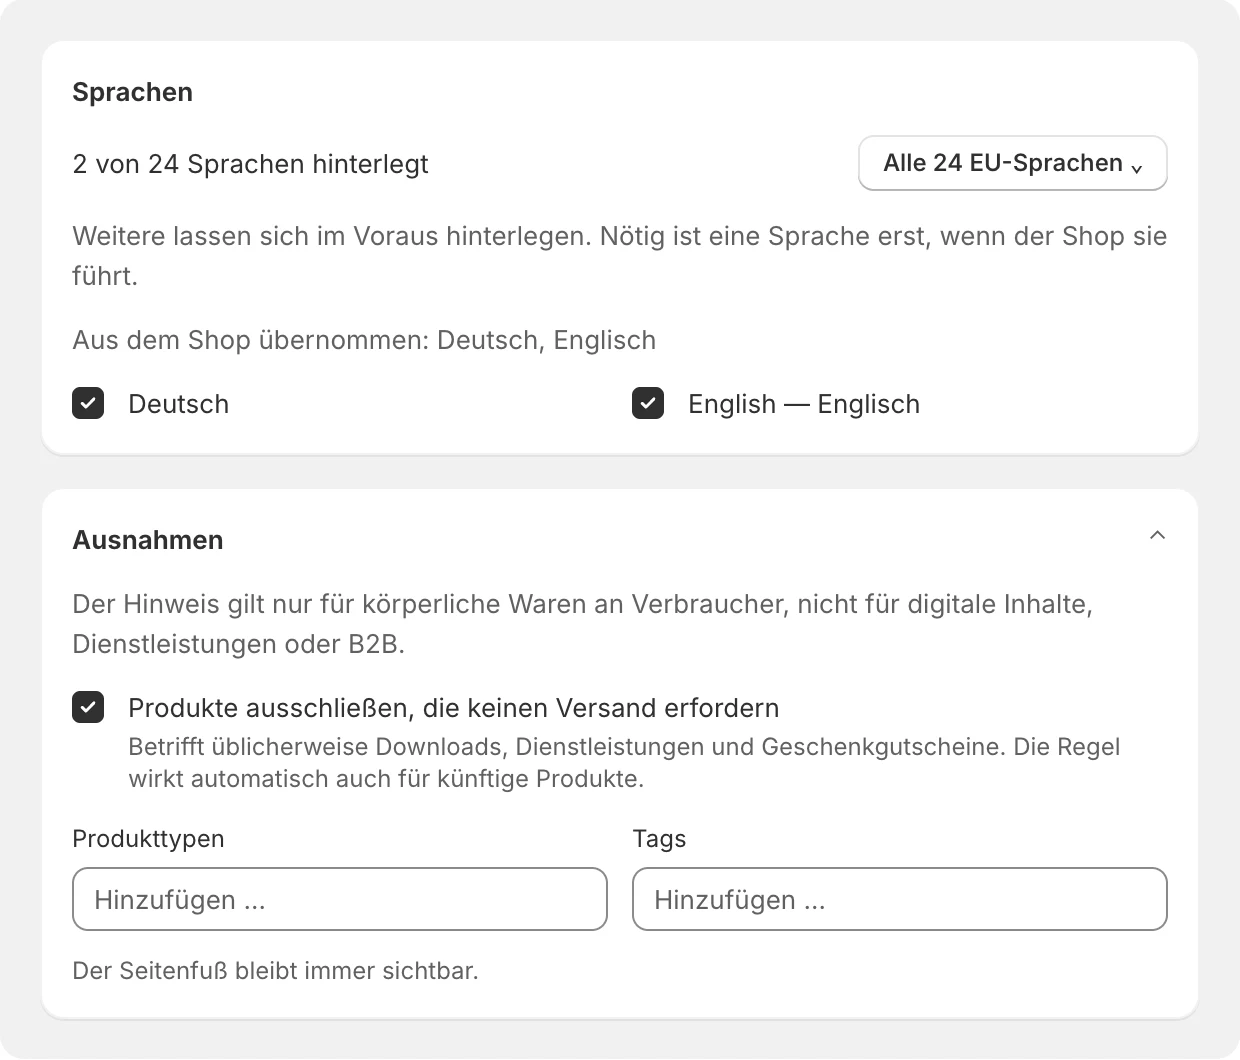
The app shows the notice in the language your customer has chosen in the shop. It picks up your shop’s languages by itself. If you later add a language without a graphic, the app warns you, and one tick is enough. Under “Exceptions” you exclude products that are not shipped, such as downloads, services and gift cards, with one tick, as well as individual products or whole product types, tags and collections.
Step 6: Add producer guarantees, if any
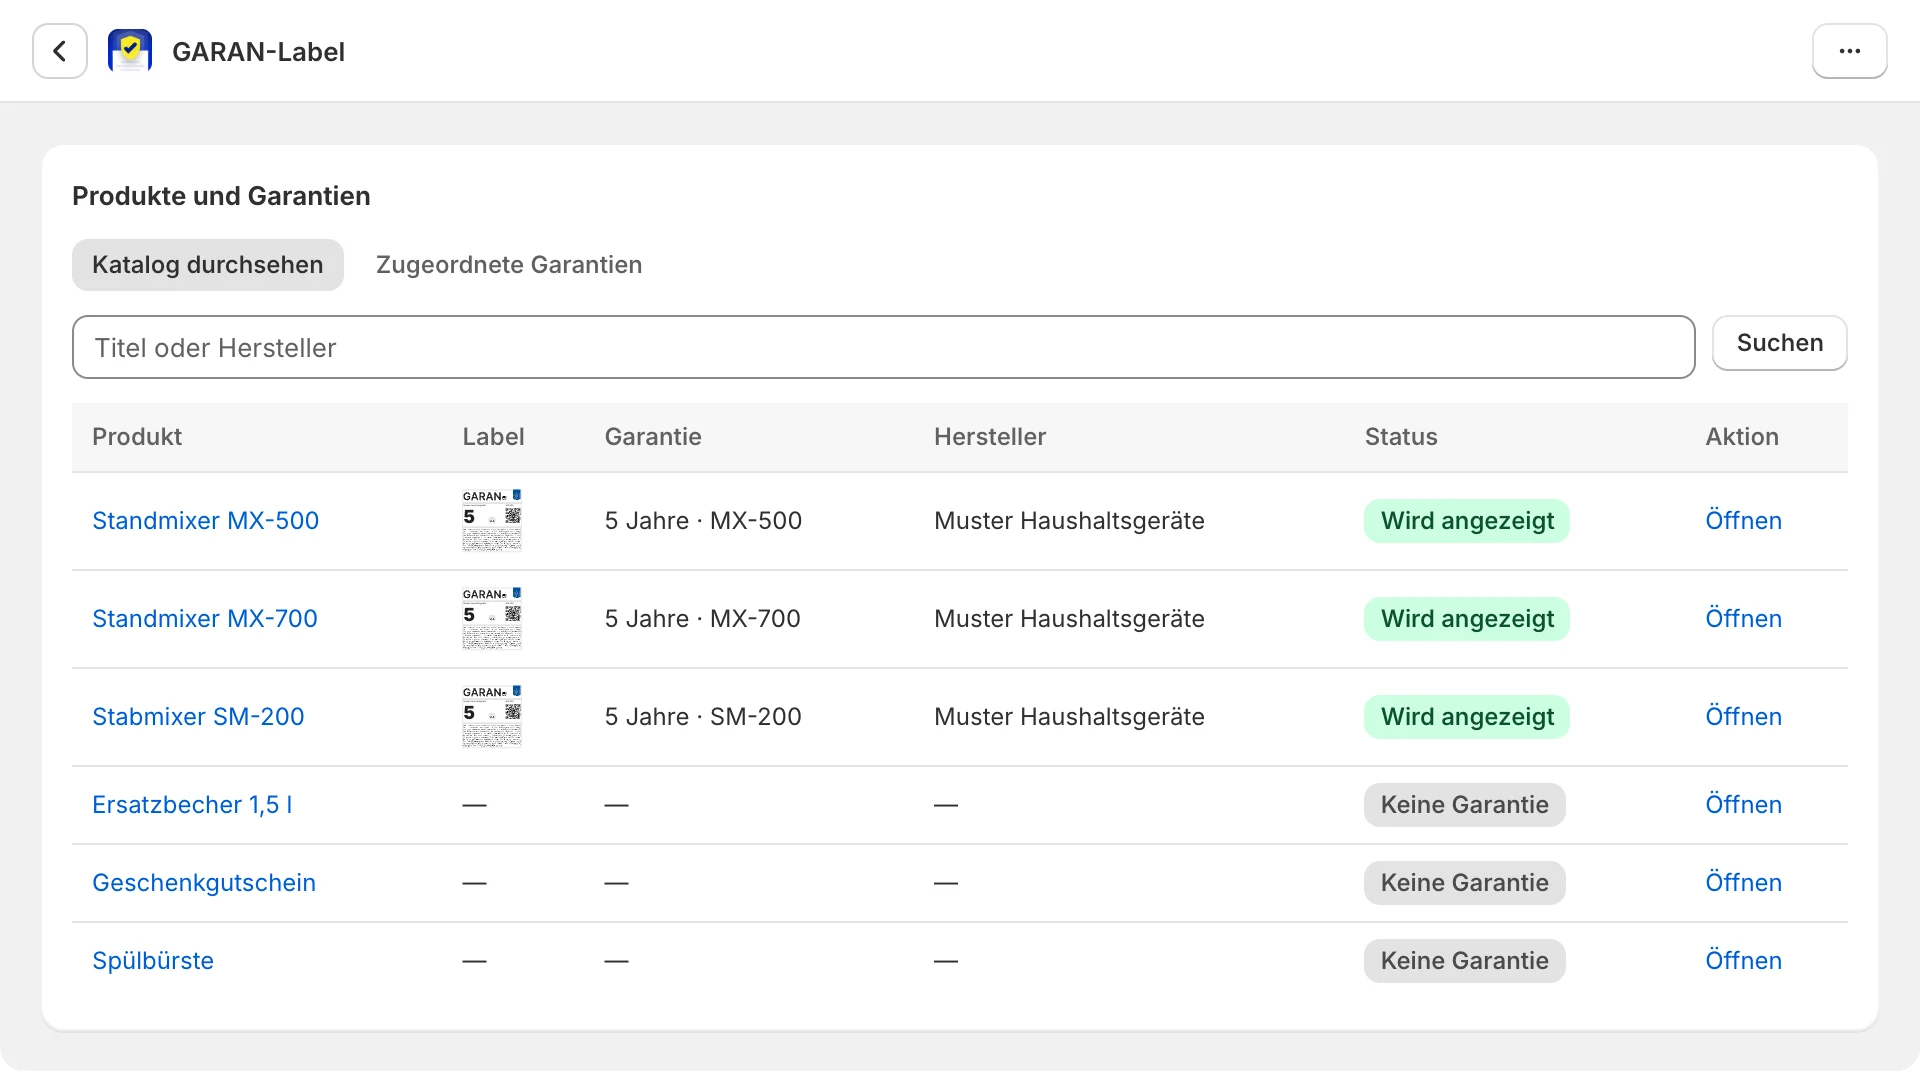
If a producer gives a commercial guarantee of durability of more than two years free of charge, first add the producer once with the mandatory details. Then assign the products under “GARAN label”. The list shows the label for each product, the guarantee and whether it is displayed in the shop. On the Enterprise plan you can assign many products at once.
Step 7: Add the snippet to the order confirmation
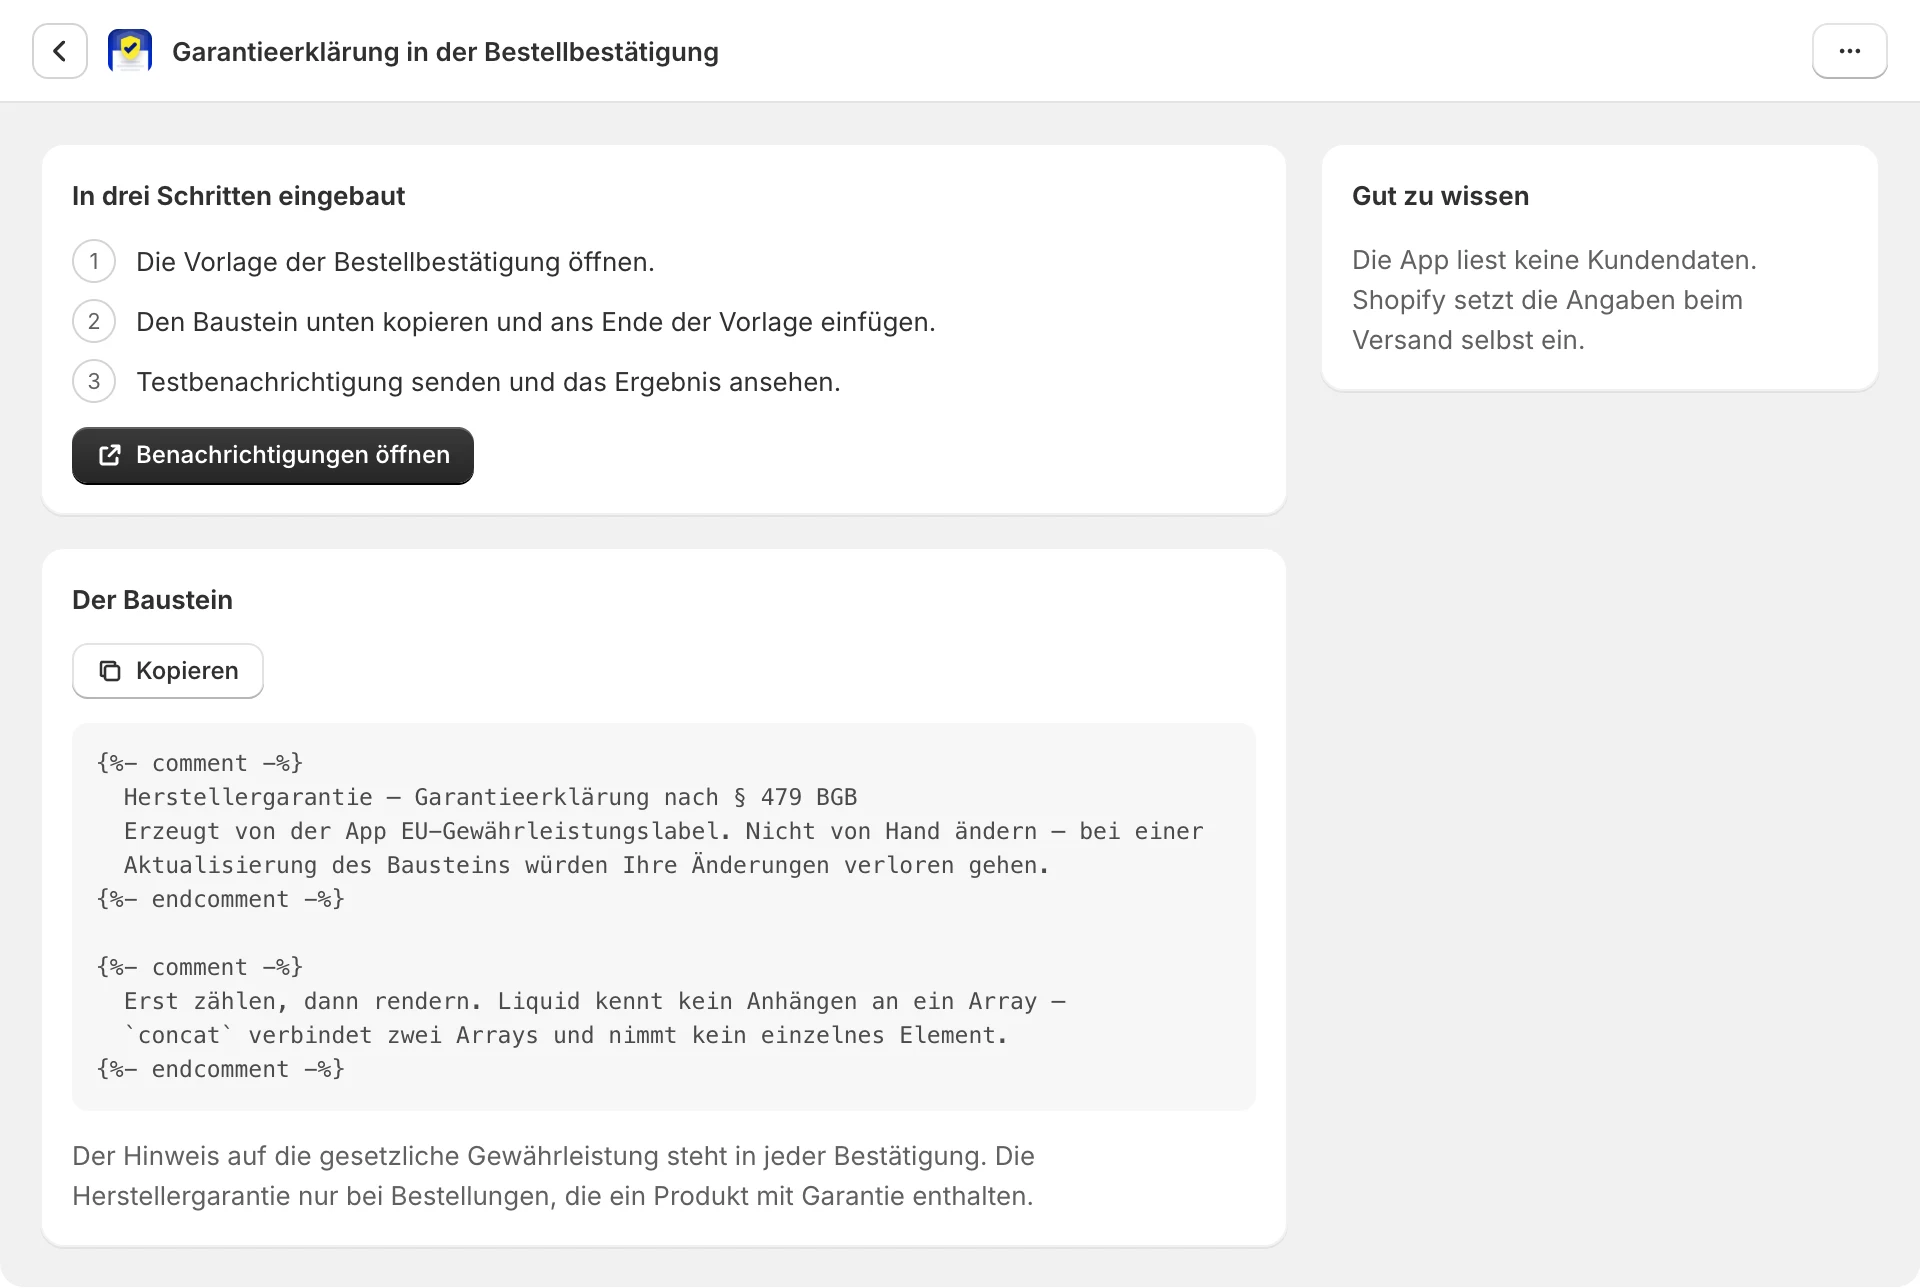
Click “Open notifications”, copy the snippet and paste it at the end of the template. Then send a test notification. From then on, the notice on the legal guarantee appears in every confirmation, and the guarantee statement only in orders with a guarantee product. The app reads no customer data for this; Shopify fills in the details itself when sending.
Done: check your shop
Open a product page and the cart in your shop. The notice appears in the places you chose, and one click opens the full graphic. From now on we also check every day, automatically, that it is visible.
Frequently asked questions
Do I need a developer?
No. Everything happens in the app and in the theme editor. For custom themes or special requests, we help you personally.
How long does the setup take?
Usually about ten minutes. With producer guarantees for many products it takes a little longer; on the Enterprise plan you can also assign them in bulk.
What happens when I change my theme?
With automatic placement, the app places the notice in the new theme too. If you placed the block manually, drag it to its spot once in the new theme.